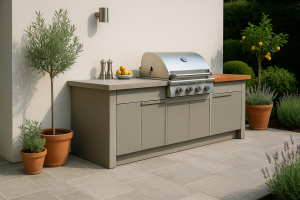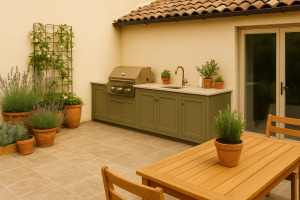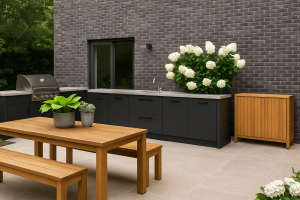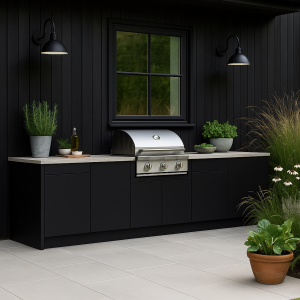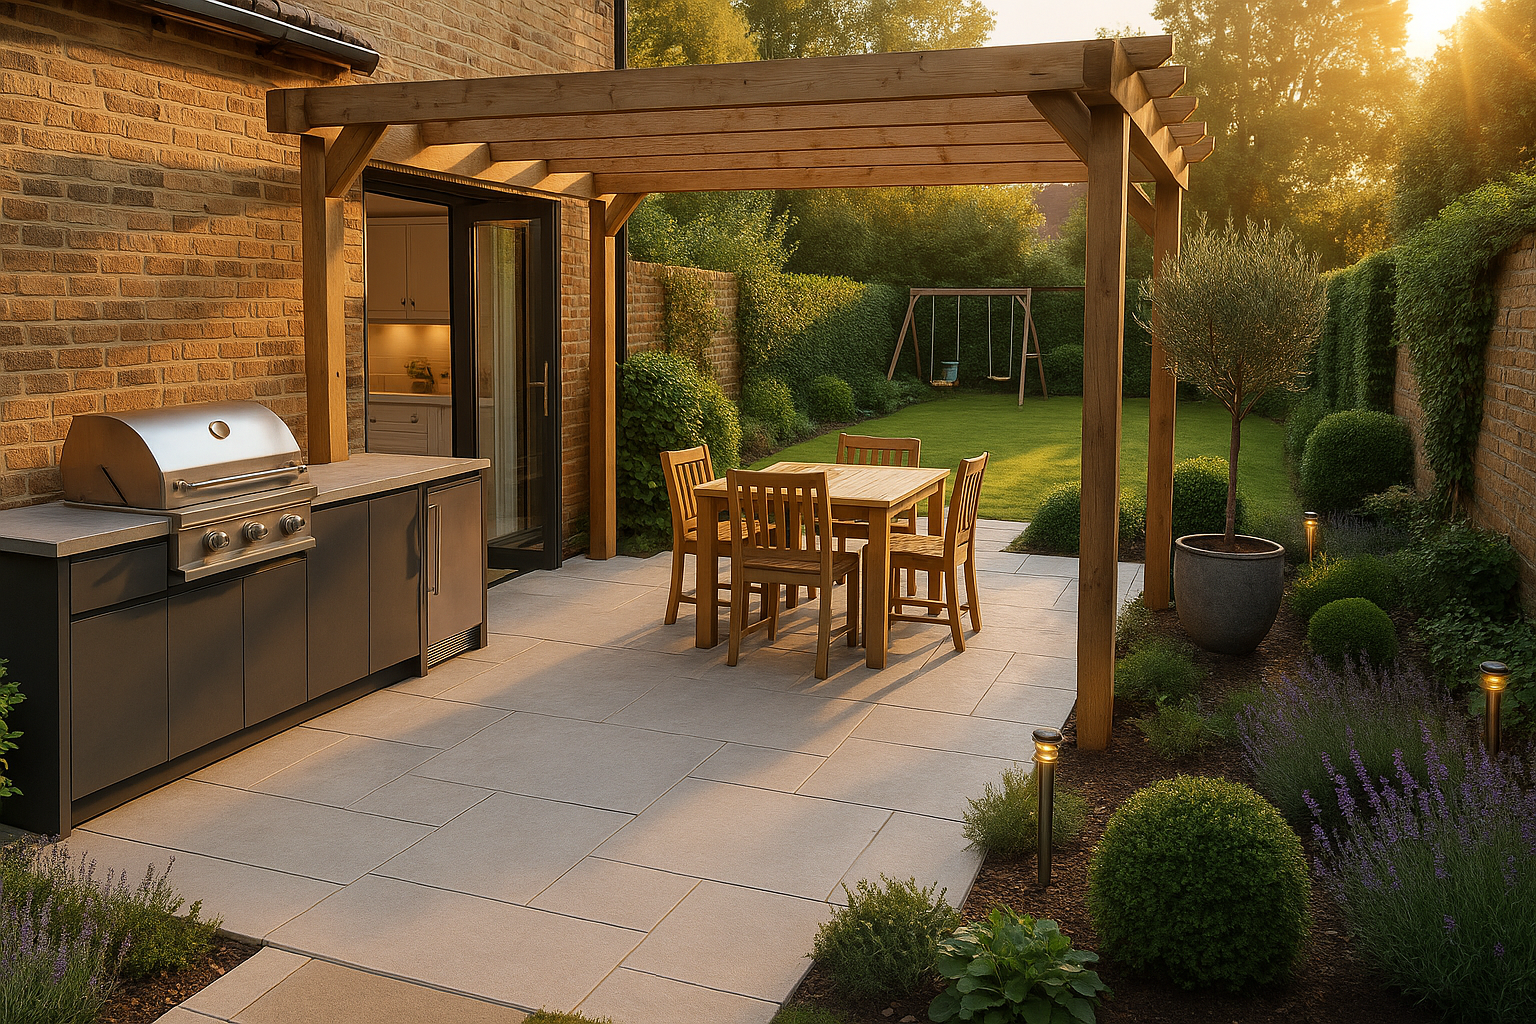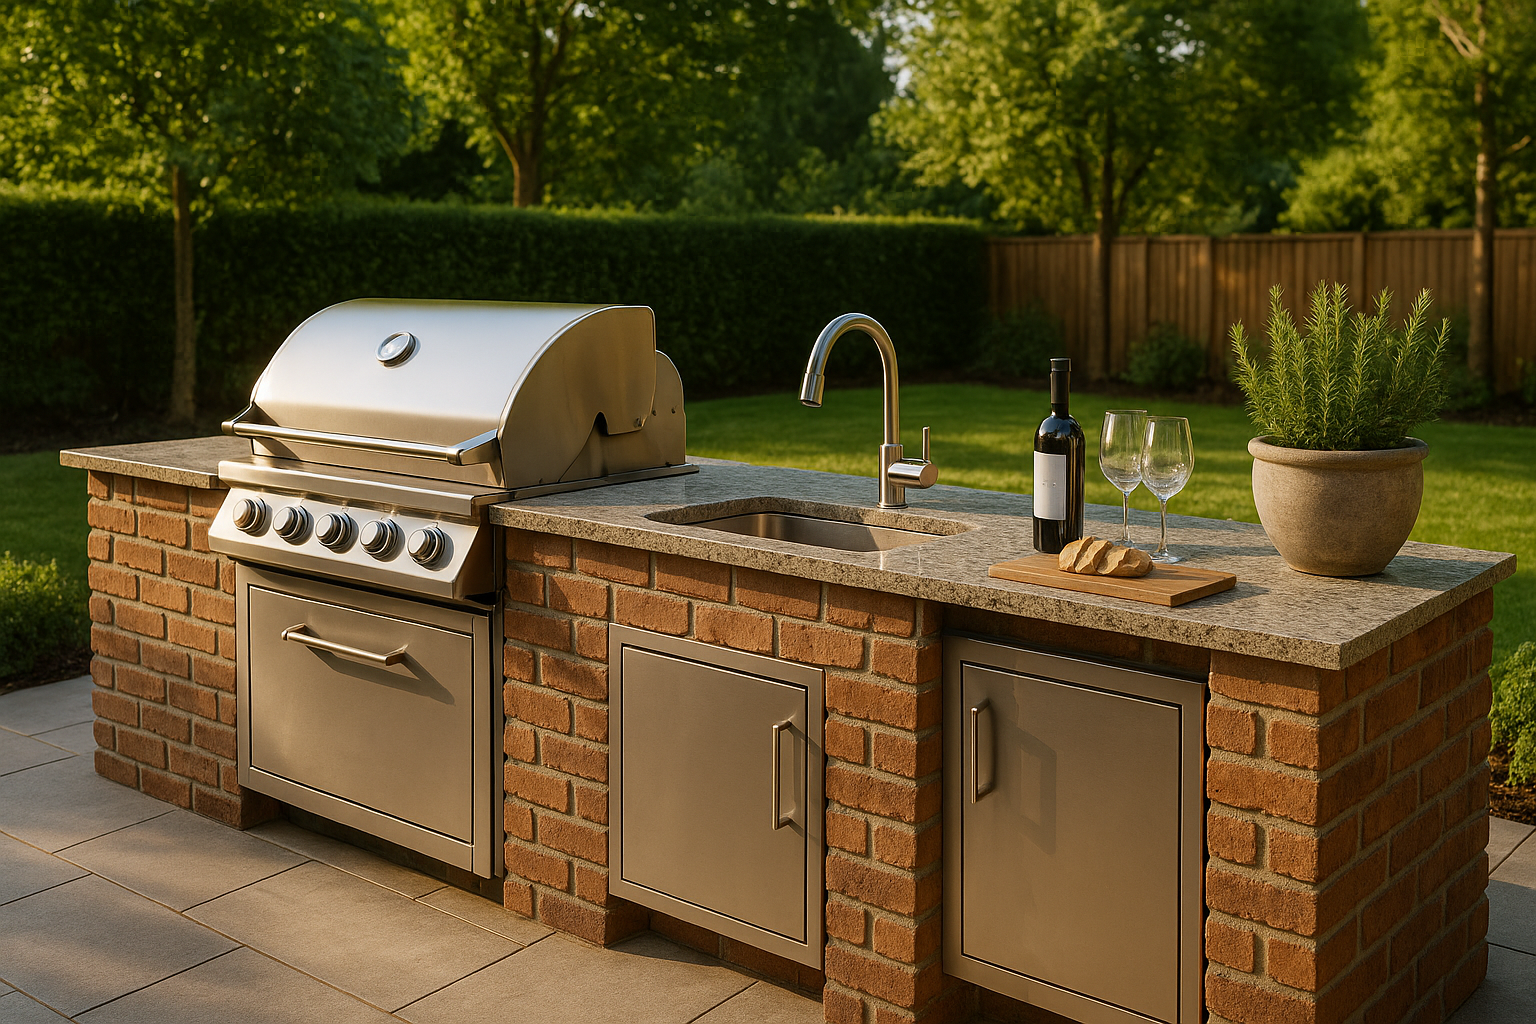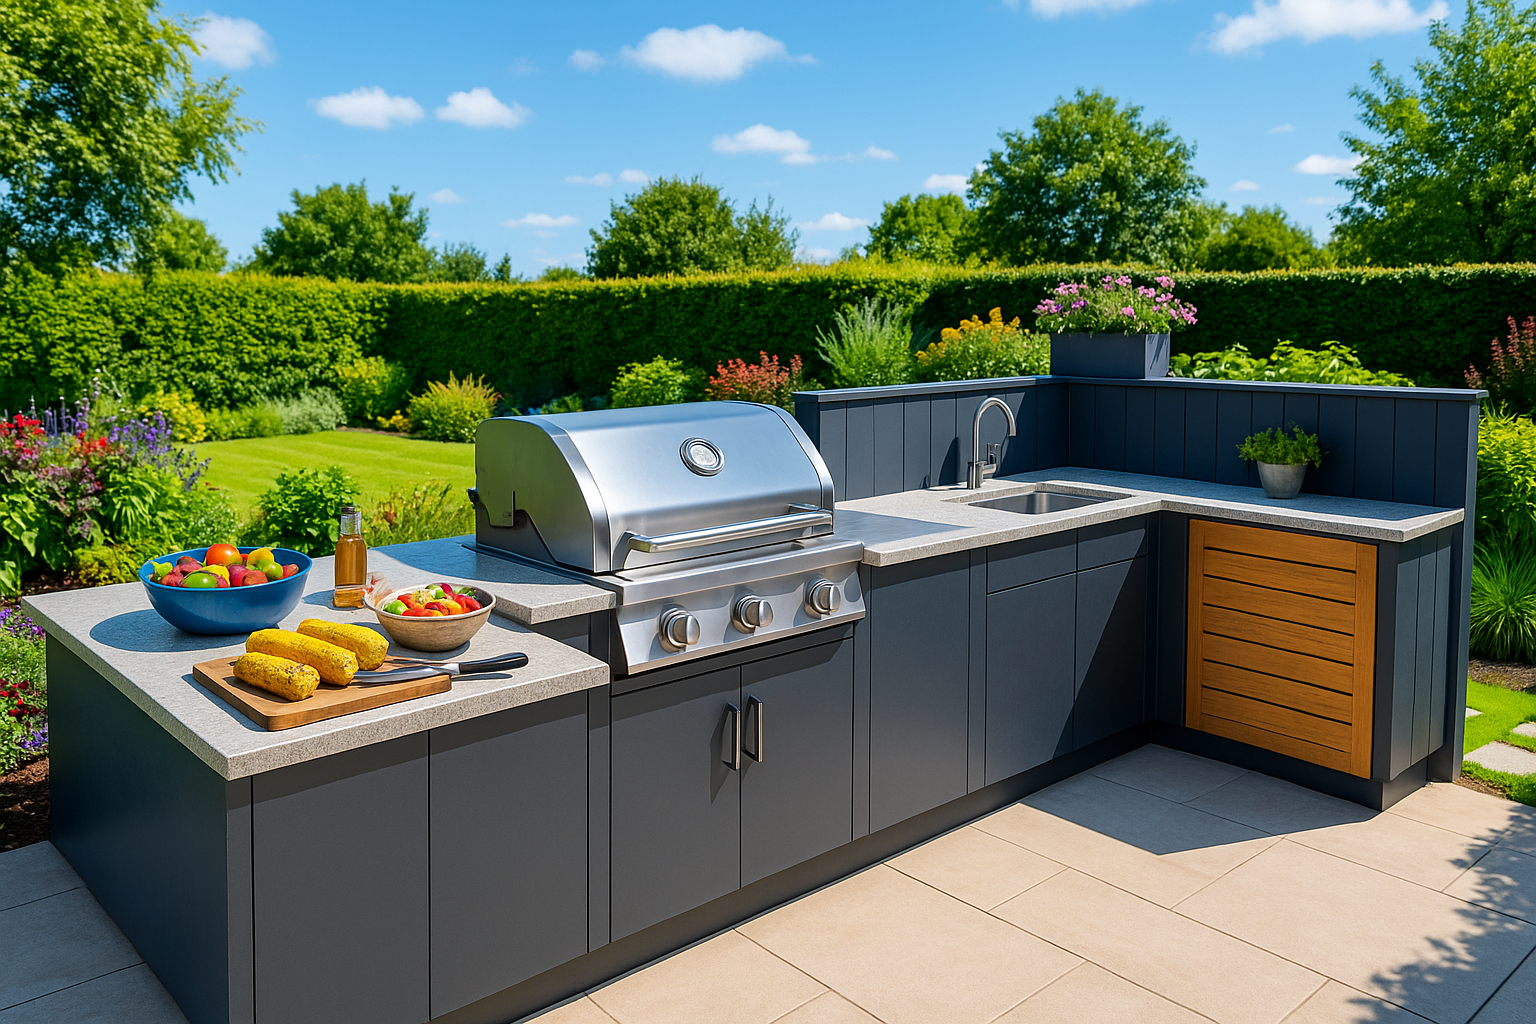
Outdoor Kitchen Starter Kit: What You Need on Day One

The best outdoor kitchens do not start as showrooms. They start with a small set of reliable pieces that let you cook three nights a week without fuss. Day one is about getting heat, prep space, safe power and lighting in place so the area feels like part of the home rather than an occasional weekend stage. You can always add a pizza oven or a drinks centre later. Begin with a tight kit that works in real weather and you will use it far more.

1. Your primary cooker

Pick one dependable main heat source that suits your habits. Gas is fast to light and easy to control, which makes weeknight meals calm. A ceramic charcoal cooker or a quality kettle brings flavour and huge range, from high searing to low and slow, provided you allow a little more time to reach clean heat. If your garden is tight or smoke sensitive, an electric plancha or a portable induction hob can handle many meals with very low plume. Whatever you choose, insist on a good lid, stable temperature control and enough grill area to feed your household without cooking in five tiny batches.

2. Prep and landing space

A proper worktop on at least one side of the cooker is not a luxury. It is the difference between a relaxed dinner and a juggling act. Aim for a metre of clear prep with a second landing zone where hot trays can rest. Materials that behave outside matter here. Sintered stone and granite shrug off heat and weather. External grade porcelain copes well too. Mid tones hide day to day marks better than very light or very dark surfaces.

3. Tools

A fast read probe thermometer ends guesswork. A solid pair of tongs, a long handled spatula and heatproof gloves cover most tasks. Add a chopping board that stays put and a couple of trays for carrying food out and bringing it back in. Keep a small box outdoors with these essentials so you are not hunting around the kitchen when the grill is ready.

4. Lightings

Cooking by phone torch is funny once. Fit a bright, focused task light aimed at the cooking and prep areas so you can see doneness and read a thermometer. Then add softer ambient light where people sit and move. Warm colour temperatures make food look appealing and help brick or stone feel rich. Put the switch where you can reach it without crossing the hot zone.

5. Power and protection

If you will plug anything in, treat power as part of the starter kit. Outdoor rated sockets on an RCD protected circuit keep things safe and simple. A weather hood or in use cover protects plugs during showers. Plan cable routes so you are not stepping over leads with hot trays. If your cooker is gas, give the cylinder a ventilated store and route flexible hoses where feet and heat cannot reach them.

6. Surfaces underfoot

Feet should stay sure in rain and grease. External porcelain with a tested wet slip rating works well and cleans easily. Textured natural stone performs too if it is specified for outdoor use. Whatever the finish, set gentle falls so water moves away from the house and use a discreet channel drain at thresholds. It is easier to cook when you know the terrace will not become a skating rink after a shower.

7. Simple storage

A couple of weather sealed drawers or a lidded bench close to the cooker will transform your setup. Keep tools, firelighters, gloves and cloths here so you can start quickly. If you use charcoal or wood, store fuel in sealed bins under cover so it lights cleanly and does not perfume the space when damp.

8. Basic safety

Keep a fire blanket within easy reach and a dry powder extinguisher nearby. Respect manufacturer clearances around hot zones, especially beneath pergolas and beside screens or planting. Place the cooker so smoke drifts away from doors and seating most of the year. Lids down cooking and dry fuel reduce odours and keep neighbours happy.

9. A small sink

You can live without a sink on day one. If there is room, a compact bowl with a proper trap and an isolation valve makes prep calmer and clean down faster. In cold climates, fit valves so you can drain the line before hard frosts. If a sink is not possible initially, keep a covered tub for quick rinsing and plan the service for phase two.

Bonus Tip: Starter layout that just works

Place the hot zone at the edge of the terrace with a clear route behind the cook. Put prep to the dominant hand side and a landing zone to the other. Keep at least ninety centimetres of walkway behind anyone cooking so guests can pass without brush by heat. Seating belongs where smoke does not, ideally with a little evening sun and a view of the cook rather than a view of the cooker lid.

First shop checklist

On day one you need fuel, ignition, tools, trays, a thermometer, cloths and a simple cleaning kit.

  • For gas, check your regulator and hose are in date and secure.
  • For charcoal, choose quality lumpwood or briquettes and a chimney starter.
  • For planchas or induction, confirm power and cable reach. Add a mild degreaser, paper towel and a soft brush so you can reset the area in five minutes when you are done.

Starter Kit Menus

Pick meals that show off the new space without stress. Thin steaks, burgers, sausages, skewers, prawns and quick vegetables cover weeknights. Whole chickens, ribs and pizzas can wait until you know your heat and airflow. The aim in month one is frequent use and zero drama.

What to add in phase two

Once you are cooking often, you will know what you miss. Many households add a plancha for low smoke cooking, a small pizza oven for gatherings or a fridge for drinks and dairy. Others add wind control, a simple pergola or side blinds. The best upgrades come from experience, not from a brochure list.

Common mistakes to avoid

  • Do not buy a stack of appliances before you have safe prep space and good lighting.
  • Do not squeeze the cooker under a solid roof without thinking about extraction and clearances.
  • Do not set paving dead flat. Do not forget where fuel, tools and covers will live.
  • Do not choose worktop or paving colours that fight the house.
  • Test samples outside in sun and shade and when wet so you know how they will feel on real days.

The takeaway

A useful outdoor kitchen begins with a small set of honest pieces that make everyday meals easy. One reliable cooker, real prep space, safe lighting and power, and a surface that drains and grips are enough to start. Keep tools to hand, build simple habits and let the space earn its keep. When you cook more often than you thought you would, you will know exactly which upgrades will bring the most joy.
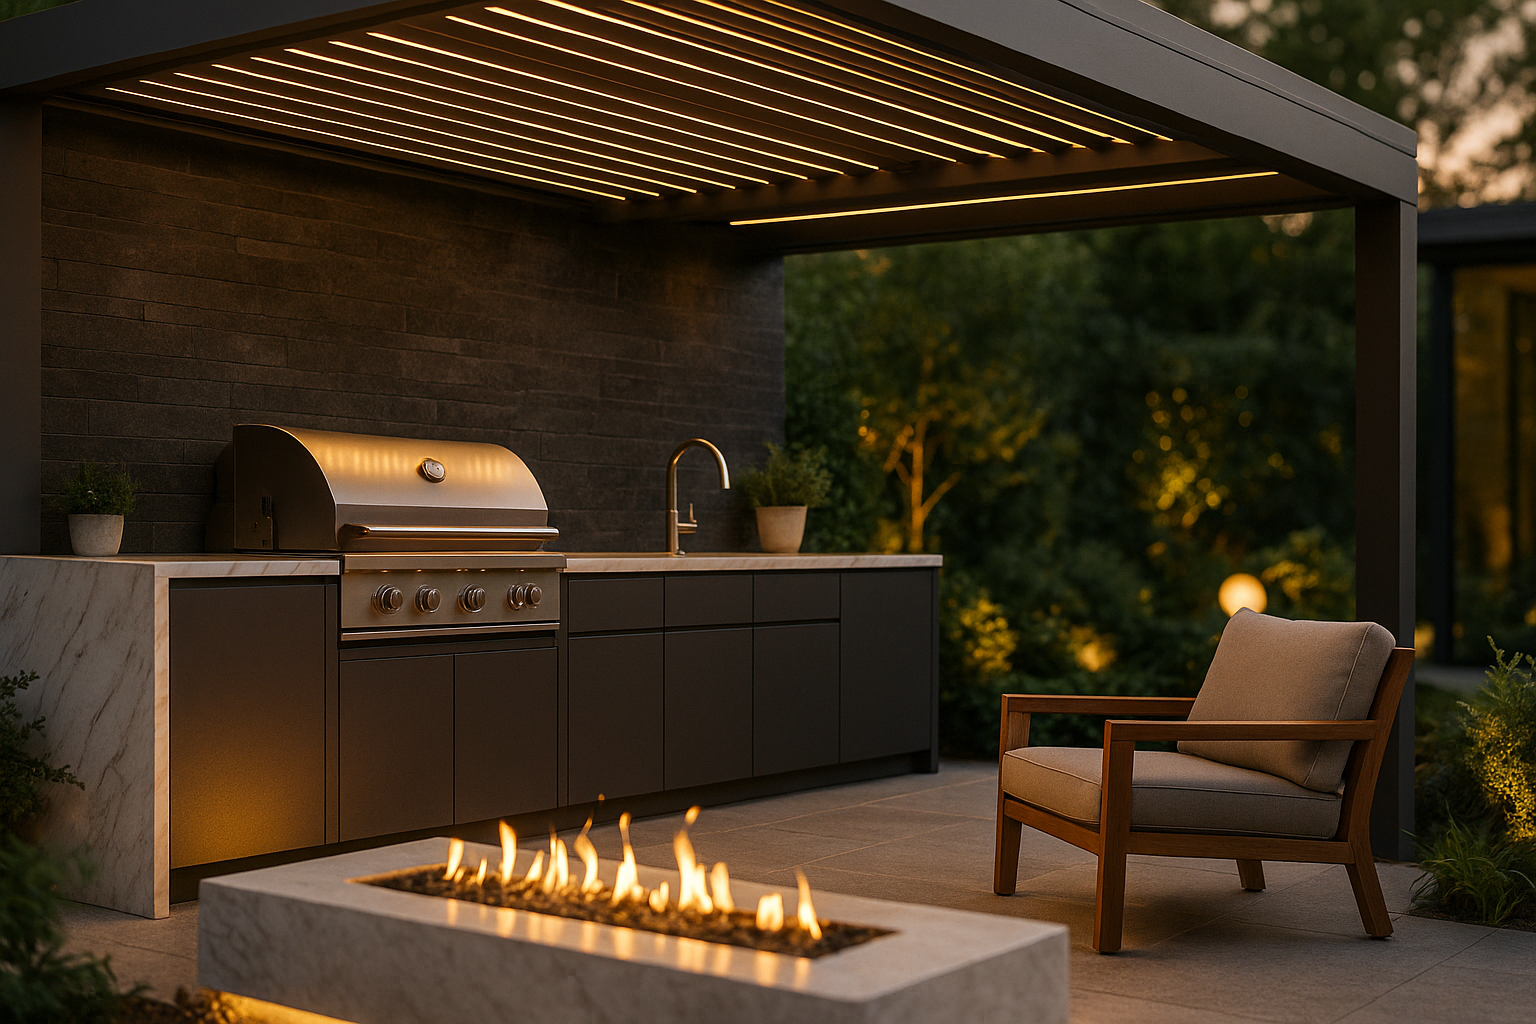
Ready to get started? Contact us today!

Why Outdoor Kitchens Are Having a Moment

People want to live more of life at home without it feeling cramped. An outdoor kitchen turns the garden into another room, adds social space, and makes weeknight meals feel like mini holidays. With better shelter, smarter appliances and durable materials, it now works in real UK weather rather than just on the two hottest days of the year.

From trend to everyday habit

Not long ago, a barbecue on the lawn counted as “alfresco.” Today, families want a place to prep, cook, eat and linger that feels as comfortable as the dining room. The shift is part lifestyle and part practicality. Working from home means lunch in the sun is suddenly possible. Weekends at home feel richer when there is a spot to gather that is not the sofa. The outdoor kitchen earns its keep because it is always there, ready for a quick midweek cook or a long, easy Saturday.

Making rooms

House extensions are brilliant but costly and disruptive. An outdoor kitchen creates usable space with less upheaval. A modest run of cabinetry, a reliable main grill, safe worktops and a simple pergola deliver a new “room” for a fraction of the time and budget. Add seating and soft lighting and you have somewhere to host twelve without squeezing indoors.

Cooking

Food tastes different outside. A gas grill makes fast, controlled midweek meals. A kamado or pizza oven adds theatre at weekends. Electric planchas and portable induction bring low-smoke options for tight gardens. The mix is flexible, which means the space serves quick family dinners as well as slow, sociable evenings.

Year-round comfort

What changed in recent years is shelter and drainage. Louvred or lightweight roofs keep showers off while letting steam out. Porcelain paving stays grippy with the right texture and drains cleanly if levels are set correctly. Layered lighting and discreet radiant heaters turn shoulder seasons into real cooking months. The result is a space that works in March, July and October, not only in heatwaves.

Better for togetherness

Indoor cooking can push the chef into a corner. Outdoors, the cook stays in the conversation. Kids drift between lawn and table. Friends gather without hovering over a hob. The layout naturally slows everyone down. It is easier to say yes to “come round for a quick bite” when reset is simple and crumbs live outside.

Kerb appeal

Buyers respond to homes that feel larger and more useful. A tidy, well designed outdoor kitchen signals care, adds a lifestyle image to the listing, and helps a property stand out. Even a compact, honest setup reads as premium if materials match the house and the details are neat.

Low-maintenance materials

External-grade porcelain for paving, sintered stone or granite for worktops, powder-coated metals and a few warm timber accents form a practical palette. These materials wipe clean, resist frost and suit UK light. Keep colours in mid tones so day-to-day marks vanish and the space stays calm.

Simple designs

Put the hot zone at the edge of the terrace with clear routes behind the cook. Keep at least 900 mm of walkway and give the grill landing space on both sides for hot trays. Build subtle falls away from the house and use channel drains where water gathers. Plan power on RCD-protected circuits and fit an outdoor-rated hood if you sit under a roof with sheltered sides.

Smoke, neighbours and good manners

A well sited grill faces the breeze so smoke drifts away from doors and seating. Lids-down cooking and dry fuel reduce odours. In tight terraces, a plancha or electric element covers low-smoke nights, with the charcoal or pizza ritual saved for weekends when air is still and windows are shut.

Budget and timelines

A compact “essentials” kitchen with porcelain terrace, gas grill, lighting and power can be delivered in weeks once on site. Larger builds with louvred roofs, bespoke worktops and multiple appliances take longer, mostly due to lead times. The quickest projects happen when decisions are made up front and services are planned before paving goes down.

Avoidable mistakes

Common pitfalls include flat paving that pools, grills squeezed under solid roofs without extraction, tiny worktops that force a balancing act, and buying appliances before the layout is agreed. Solve these with early drawings, measured clearances and a short list of materials that behave outdoors.

Where to start

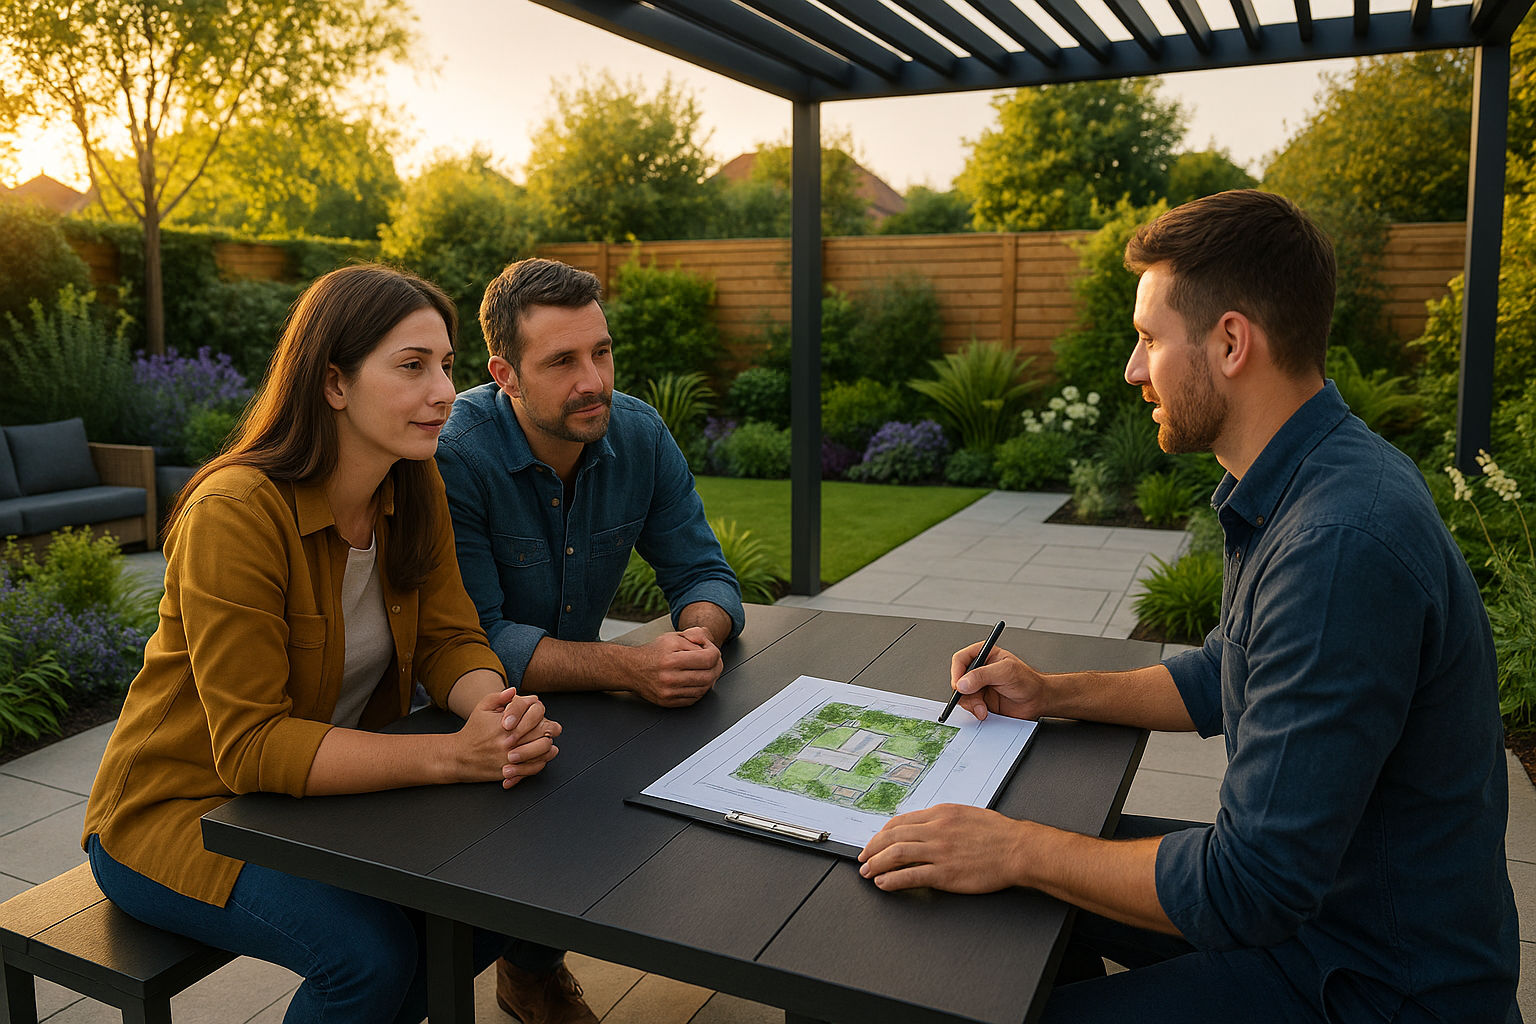
Walk the garden and find the spot with winter sun and a little shelter from the prevailing wind. Sketch a simple line: prep, cook, serve, seat. Choose one main heat source you will use three nights a week, then add a flavour appliance later if you still want more. Keep the palette simple and let planting soften the edges.

The takeaway

Outdoor kitchens are having a moment because they meet a real need. They give homes more space, make everyday meals feel special, and invite people to linger together. Build the bones right with drainage, power and safe clearances, choose honest materials and a layout that breathes, and you will use the space through the seasons with a smile.

Ready to plan yours? Book an outdoor kitchen consultation.

Enhance Your Outdoor Spaces with a Natural Stone Patio

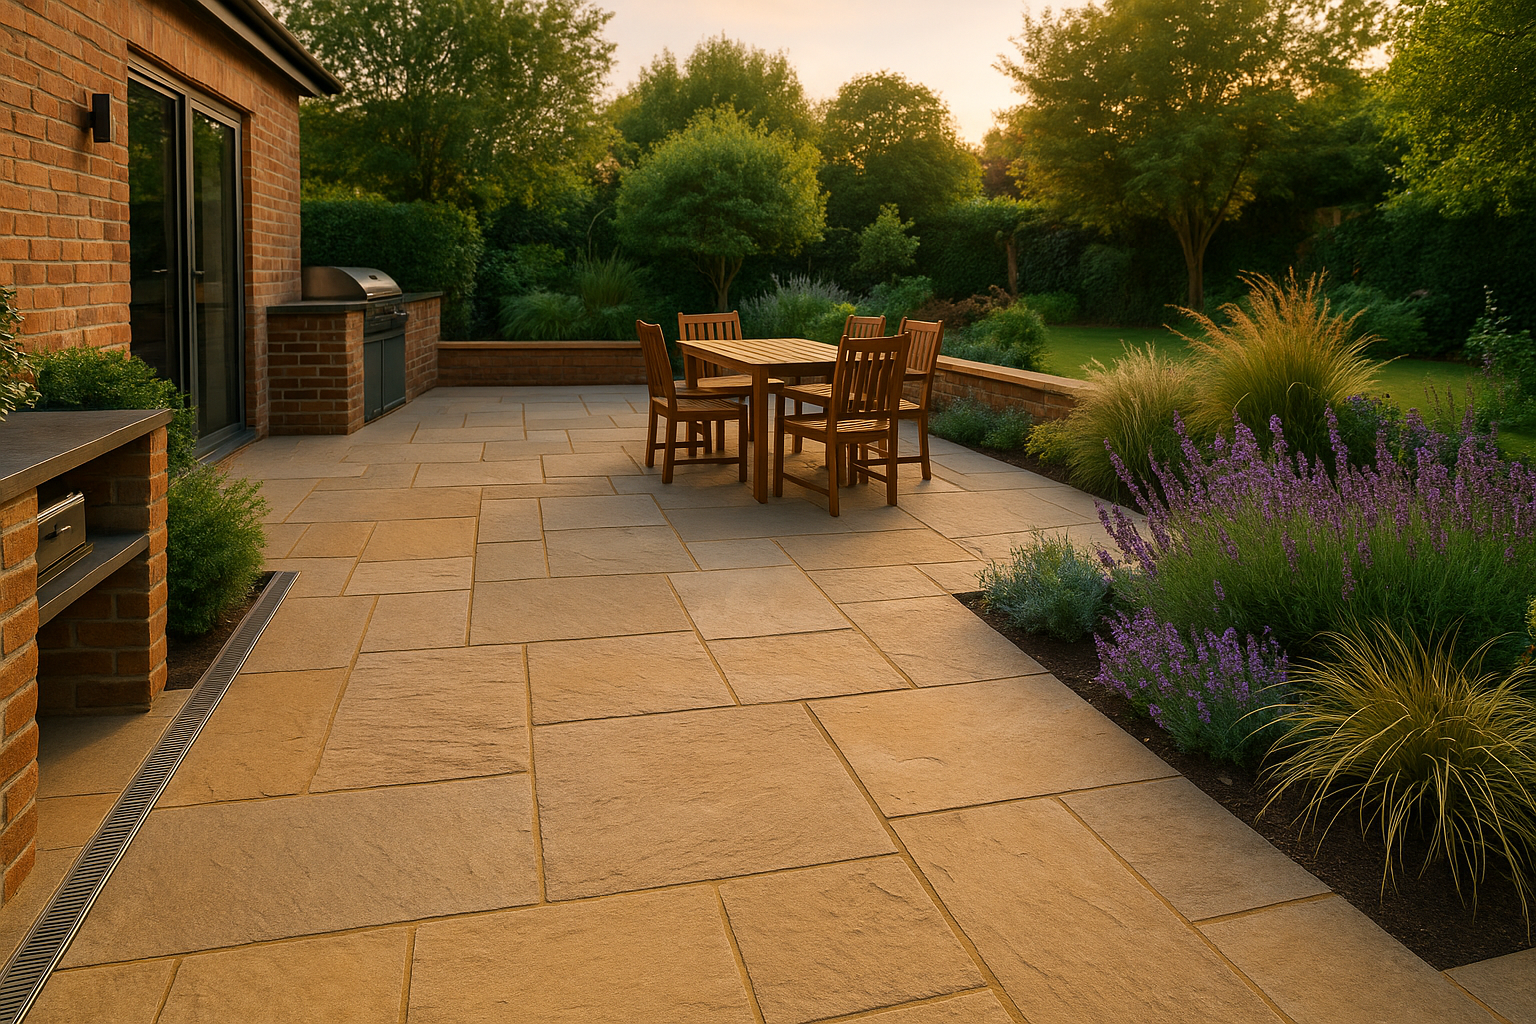
A natural stone patio brings character that manufactured materials struggle to match. Every slab has unique veining and tone, which makes the space feel established from day one. Stone is durable in British weather, easy to live with once detailed correctly, and it pairs beautifully with planting, timber and brick. If you want a terrace that looks at home beside your property and ages gracefully, natural stone is a strong foundation for any outdoor scheme.

Picking the right stone for your home

Start with the style of your property and the light in your garden. Sandstone offers warm, varied shades that suit traditional brick and cottage settings. Limestone gives a tighter, more contemporary grain with cooler tones that flatter render and modern extensions. Granite is dense, speckled and very hard wearing, ideal for busy routes and dining zones. Slate has strong colour and texture for smaller patios or courtyards. Bring samples outside and look at them in sun and shade so you can judge how the tones shift through the day.

Finish and slip resistance

Texture matters in the UK climate. A lightly riven or shot-blasted finish provides grip in the wet while still feeling comfortable underfoot. Very smooth or polished surfaces can be slippery when it rains. For steps and edges, consider a subtle contrast or a pencil line to make the nosing easy to see at night. If you plan a hot tub or cooking area, choose a finish that stays grippy with a film of water or oil.

Colours

Natural stone loves company. Pair warm buff or golden sandstone with honey timber and bronze accents for a relaxed, timeless palette. Match cool grey limestone or granite with charcoal metalwork and mid-tone timber for a clean, modern look. If your home has mixed stone or brick, echo one of the lighter tones in the patio and repeat the darker tone in planters or edging so the whole composition feels intentional.

Laying patterns

The pattern is more than decoration. It guides movement and defines spaces. Random length layouts create a relaxed, informal feel for family terraces. A coursed pattern gives calm order beside contemporary architecture. Setts used as a border frame the space and protect edges from scuffing. Herringbone setts in entrances add traction and a crafted detail. If your patio steps down to a lawn, run a soldier course along the edge to give a crisp transition.

Base, falls and joints

A beautiful patio earns its keep when it drains cleanly and stays level. Prepare a well compacted sub-base on a solid formation. Establish gentle falls away from the house so water never sits at the threshold. Lay stone on a full mortar bed for consistent support, not dabs. Keep joint widths uniform and use an appropriate jointing compound or mortar. On clay sites, include linear channels and silt baskets at key points with easy access for cleaning. These details matter more than any catalogue photo.

Doors and thresholds

Modern bifolds and sliders sit low. Protect them with a discreet channel drain and a small height step down to the patio so wind-driven rain cannot track indoors. A matching stone threshold or a neat metal drain edge keeps the look tidy. On older properties with higher sills, keep the first course of stone consistent to avoid awkward cuts, then step down with a gentle riser or two to the main terrace.

Cooking, dining and lounging

Stone makes a stable base for furniture and outdoor kitchens. Plan a dedicated cooking zone at the edge of the terrace with safe clearances to timber and planting. Keep a landing space either side of the grill so trays can rest without a scramble. Locate dining where evening light falls and allow room to pull chairs back without catching planters. Place lounge furniture where you get winter sun and wind protection. The patio becomes more useful when each area has a purpose.

Stones and Plants

Stone holds warmth and frames foliage beautifully. Use evergreen structure for year-round shape, then weave in soft grasses and seasonal colour. Herbs such as thyme and rosemary thrive near warm stone and release scent when brushed. In small courtyards, climbers on wires lift planting without stealing floor space. Leave occasional pockets between stones or along edges for thyme, saxifrage or creeping rosemary to spill over.

Lightings

Layer light rather than relying on a bright flood. A focused task light by the grill keeps cooking calm. Low bollards or recessed markers along routes prevent trips without glare. A soft wash on a feature wall or specimen tree adds depth. Warm colour temperatures around 2700–3000 K flatter stone and make food look appetising. Put controls where you can reach them without crossing the hot zone.

Heating and shelter

A louvred pergola or simple canopy keeps showers off and controls glare on hot days. Position side screens to take the edge off wind without trapping smoke. Choose discreet radiant heaters aimed at seating rather than large glowing boxes. Shelter and gentle heat make spring and autumn evenings feel generous, which means you get more value from the patio.

Care and maintenance

Natural stone is straightforward if you keep to gentle habits. Sweep little and often to remove grit. Treat algae as soon as it appears in shady corners. Use a pH-appropriate cleaner for your stone type and rinse well. Avoid harsh acids on limestone and slate. Repoint or top up joints if they open so water does not sit under edges. Heavy pressure washing should be rare and followed by joint repairs where needed.

Common mistakes to avoid

The most frequent problems come from flat levels, narrow joints and incomplete support under slabs. Another is choosing a colour that fights the house. Test samples against your walls and look at them when wet. Finally, resist the urge to build right up to the fence on every side. Leaving a planting strip softens the edge, improves drainage and gives you a place for lighting cable routes.

Budgeting and sensible phasing

If funds are tight, build the base and core terrace now and leave planters, a pergola or the outdoor kitchen for phase two. Services such as conduit for power and future lighting should go in with the patio so you do not need to lift slabs later. Spend on the base and drainage first. Everything else is easier to upgrade in time.

When natural stone beats alternatives

Porcelain is excellent for low maintenance, yet natural stone wins when you want texture, patina and a look that belongs with older brick or varied façades. Stone feels cooler in heat, settles visually with age, and it tells a story in a way that printed finishes cannot. If your home has character, stone is often the finish that respects it best.

The takeaway

A natural stone patio can transform how you use your garden. Choose a stone that suits your home, pick a finish with safe grip, and build in falls and drainage that handle real weather. Zone the space for cooking and relaxing, add planting that softens the edges, and light it so evenings feel easy. Do the fundamentals well and your patio will look beautiful on day one and still feel solid five winters from now.

Ideas for Sloped Driveways

A driveway on an incline can be elegant, safe and low-maintenance when it is planned well. The trick is to think about movement first. People, cars and water all behave differently on a slope. If your design guides each one calmly, the incline becomes a feature rather than a flaw. What follows is a practical guide written for UK conditions, with plenty of ideas you can adapt to any plot.

Begin with the line, not the surface

Before you choose materials, sketch the route. A gentle curve usually feels more natural than a straight shot up or down. Curves encourage slower speeds, soften the view and create places to pause. If the gradient is strong, introduce a short level section near gates or the garage. That landing makes parking easier, provides a natural position for a drain, and reduces the feeling that you are fighting gravity every time you arrive home.

Make water your first design brief

Rain will always try to race downhill. Your job is to interrupt and steer it. Start at the top with a channel to catch water before it reaches the drive. Give the surface a gentle crossfall so water drifts to the side rather than running down the tyre lines. Add a second channel near the foot of the slope to protect thresholds. On long runs, slim slot drains set at intervals work like quiet speed bumps for water. If your soil is heavy clay, pair these channels with a properly sized soakaway or crate system and a safe overflow so storms do not overwhelm the layout.

Choose textures that bite in the wet

Grip matters more on a slope than on a flat forecourt. Resin bound surfacing with an extra anti-slip broadcast gives a clean look with dependable traction. Broom-finished or exposed aggregate concrete provides consistent underfoot grip and is easy to detail with control joints. Block paving laid in herringbone resists creep on inclines and can be specified with strong wet slip ratings. Porcelain or natural stone can work if the finish is genuinely textured and rated for external use on slopes. If you love a smooth surface, add rougher wheel tracks in stone setts so the tyres always have a high friction path.

Build a base that will not drift

Slopes punish weak foundations. Use a deeper, well compacted sub-base than you would on level ground and lock it with good edge restraints. In clay areas, geogrids or cellular confinement help the base hold position during wet and dry cycles. Permeable constructions need open-graded stone in layers and the same attention to edges, otherwise the surface can creep downhill over time. Respect expansion gaps during installation so seasonal movement does not create ridges.

Give pedestrians an easier route

Driving up a slope is one thing. Walking up it in the rain is another. A side path with shallow steps, generous treads and a simple handrail turns a daily trudge into a safe route. Keep the path independent of the vehicle area so you never need to share space with reversing cars. At night, light the path and the drive separately. Low markers along edges and a brighter pool at landings make the incline feel calm rather than dramatic.

Use retaining walls as part of the design

Where soil needs to be held, treat the wall as a design opportunity. Brick that matches the house looks timeless. Dry stone brings texture and a hand-built feel. Crisp rendered planes suit modern homes. Whatever the style, build weep holes or concealed outlets into the wall so trapped water cannot push against it. Step long walls, vary heights and introduce planting pockets to avoid a heavy look.

Ease the breakover at the foot and the top

Two moments often cause scrapes. The first is where a steep drive meets the flat pavement. The second is where a car crest meets the level area by a garage. A short transition ramp at each end smooths the angle. A recessed channel drain across the threshold keeps water out without creating a bump. If you own a low car, check approach and departure angles on a sketch before you set final levels.

Layout ideas that work

  • The gentle S-curve with a landing. A soft S-curve splits the run into two shorter slopes and introduces a level pad midway. The pad is a natural place for a drain and a delivery stop. Visually, the curve reduces the sense of height and lets you tuck parking neatly near the door.
  • The ribbon driveway. Two textured wheel strips with a planted or gravel centre reduce hard surface and add charm to narrow plots. Setts or broomed concrete in the ribbons give grip, while the centre breaks water flow and softens the view from the street.
  • Terraced parking bays. On steep plots, cut the drive into short terraces linked by gentle ramps. Each terrace provides flat parking and somewhere to open doors without rolling. Small retaining walls and planting between levels turn engineering into garden structure.
  • The permeable ladder. Alternate permeable pavers or grid panels with green strips. The strips slow runoff, support biodiversity and help meet local drainage guidance. This approach works well where the slope is moderate but the catchment is large.

Materials palettes that suit different homes

  • Modern: resin bound in warm grey, charcoal banding at edges, corten or black steel edging, minimalist slot drains.

  • Traditional: clay or concrete block in herringbone, stone sett borders, brick walls with soldier-course capping.

  • Rural: exposed aggregate concrete, granite setts in wheel tracks, timber or rustic stone retaining walls with native planting.

Light that helps you drive, not just decorate

On a slope you need to see edges, corners and pedestrians early. Choose low glare fittings along edges and steps, then add a brighter pool at the landing and at the garage threshold. Avoid high, bare lamps that dazzle. Smart controls that brighten with movement and dim again after arrival keep energy use low and make night-time manoeuvres simple.

Maintenance that actually matters

The best maintenance on a slope is little and often. Sweep grit so it does not polish the surface. Treat algae on shaded runs before it gets a foothold. Clear channels after leaf fall and check that joints in block paving stay full and tight. Resin and porcelain benefit from a gentle wash each spring. Heavy jet washing is rarely needed and often removes jointing, which then reduces grip.

When to bring in a professional

Long slopes, sharp gradients and structures close to the drive are signals to get advice. Experienced installers and engineers will size the sub-base, the drainage and any retaining correctly. They will also check visibility splays, highway thresholds and connections to soakaways or sewers. Good design at this stage saves expensive rework later.

A simple planning checklist

  • Where will water go at the top, middle and bottom?

  • Which surface gives the best grip for your shade and tree cover?

  • Do you have a landing near gates or garage doors?

  • Is there a separate foot route with steps and a handrail?

  • Are drains, walls and edges sized to hold position over time?

  • Does lighting make arrivals and departures calm at night?

The bottom line

A sloped driveway can be a signature feature that welcomes you home. If you guide water, choose honest textures and give people and vehicles a calm path, the incline will work for you every day. Build the base well, keep the details simple, and let planting soften the engineering. Do that and your drive will look good on day one and still feel solid five winters from now.

Got a tricky slope? Book a free site survey now.

How to Hire the Perfect Landscaping Company in Essex

A good landscaping company turns ideas into a plan that fits your home, your budget and the Essex climate. The right person will solve drainage, work with tricky levels, coordinate trusted installers and leave you with a garden that looks good in every season. The wrong fit can mean delays, overspends and a space that is hard to maintain. This guide walks you through a simple, calm process to choose well.

Step 1: Define what “perfect” means for you

Start with outcomes, not features. Do you want a family-friendly garden with play space and storage, or a calm entertaining terrace with an outdoor kitchen? List your must-haves, nice-to-haves and a realistic budget range. Note problem spots such as boggy corners, shade from neighbouring trees or lack of privacy. This becomes your brief and makes early conversations productive.

Step 2: Build a shortlist the smart way

Look locally first. “Landscaping Essex” plus your town will surface studios who already know local soils and planning quirks. Ask friends, neighbours and reputable contractors who they enjoy working with. Save three to five names whose work matches your style and plot size. Fewer is better than a long list you will never call.

Step 3: Assess credentials and approach

There are many routes into landscape design. Some companies are RHS medal winners, others are trained landscapers, architects or ex-contractors. Credentials are helpful, but the real test is whether their portfolio shows thoughtful problem solving and gardens that have matured well. Look for:

  • Projects similar in size and budget to yours

  • Before and after images and a planting plan you can understand

  • Evidence of all-weather thinking such as drainage, slip resistance and lighting

  • Relationships with reliable landscapers and specialist trades

Step 4: Read their portfolio like a pro

As you review past work, imagine living there in February, not only in July. Are routes clear and level for daily use? Is there storage for bins, bikes and cushions? Do materials suit a damp winter and bright summer glare? A strong company balances beauty with practical routines such as easy cleaning, safe steps and power where you need it.

Step 5: Arrange discovery calls

Book short calls to sense fit. Share your top goals, your budget range and any constraints. A good company will ask focused questions about lifestyle, maintenance appetite and how you want the garden to feel. You are listening for clarity, honesty and an ability to explain options in plain language. If you feel talked over, move on.

Step 6: Compare site visits and proposals

After the call, invite two of your favourites for a paid or complimentary site visit. Expect them to measure, take photos and test assumptions about sun, wind, levels and neighbour views. A solid proposal will include:

  • Summary of your brief and design stages with deliverables

  • Fees for concept, detailed design, planting plans and any planning support

  • Estimated construction budget range and typical build timelines

  • How they manage tenders and site oversight if you want help during build

Step 7: Understand pricing models

Companies commonly price by fixed stage fee or a percentage of the build cost. Fixed fees give clarity. Percentage fees scale with scope. Ask what is included at each stage, how many revisions are allowed, and what triggers extra cost. Confirm whether planning applications, structural design or lighting plans are additional.

Step 8: Ask the right questions

  • What is a realistic total budget for our goals on this plot

  • How do you approach drainage and falls so surfaces stay safe and dry

  • Which paving and worktops do you specify for low maintenance in Essex

  • How will we phase the project if we choose to build in stages

  • Who are your preferred landscapers and can we speak to recent clients

  • What does your construction oversight include during the build

  • How do you hand over care routines and plant maintenance calendars

Step 9: Check references and recent builds

Request two recent client contacts and one installer reference. Ask clients about communication, budget control and whether the finished garden fits their life. Ask installers whether the drawings were clear, the quantities accurate and decisions timely. You want a company who collaborates well with the people who will build your garden.

Step 10: Align timelines and expectations

Great gardens take time. Design stages, revisions, contractor tendering and ordering materials all add up. Spring and early summer are busy for construction while winter can be ideal for design. Get a realistic timeline with decision points and agree how you will handle weather delays. Clarity now saves stress later.

Step 11: Planning permission and compliance

Most domestic gardens are improved under permitted development, yet structures such as tall walls, roofs over outdoor kitchens, high decks or outbuildings may need approval. A capable company will flag where consents might apply, advise on neighbours, and recommend planning support if needed. They will also respect safety basics for steps, lighting and electrics that keep the space comfortable year round.

Step 12: Materials that behave in Essex

Ask for materials that cope with clay sub-grades, frost and rain. External-grade porcelain or durable natural stone with good wet slip ratings for paving. Sintered stone or granite for worktops if you add a kitchen. Timber chosen for stability and realistic upkeep. Planting that is resilient in drought and downpours, with structure for winter interest.

Step 13: Communication and project rhythm

Agree how often you will meet or call during design, how quickly emails are answered, and how design decisions are recorded. During build, weekly check-ins with the landscaper keep progress smooth. A company who runs a simple rhythm avoids small issues growing into delays.

Step 14: Red flags to avoid

Beware of proposals that skip drainage and levels, drawings that look pretty but lack dimensions, vague budgets that ignore labour, or pressure to choose trendy materials unsuited to your plot. If a company cannot show built work or avoids references, keep looking.

Step 15: Contract and deliverables

Put the scope in writing. List drawings you will receive, the number of revisions, fee stages, payment schedule, copyright terms and what is included during construction. Clear paperwork protects both sides and keeps momentum.

Step 16: Phasing if you want to spread cost

Many Essex gardens are built in two or three phases. A good company will plan services and drainage first, then structure and hardscape, then planting and features. Phasing done well avoids tearing work up later.

Step 17: Handover and aftercare

Before sign-off, you should receive planting plans, a seasonal care guide, product datasheets and supplier contacts. For complex features such as lighting controls or an outdoor kitchen, request a short handover session. The best companies want the garden to thrive long after the last photo.

Quick checklist

  • Clear brief with must-haves, nice-to-haves and budget

  • Shortlist of three companies whose work matches your style

  • Discovery calls and two site visits

  • Written proposals with stages, fees and a budget range

  • References from recent clients and a preferred installer

  • Agreement on timelines, communication and phasing

  • Contract with deliverables and payment schedule

Hiring the perfect Essex landscaping company is a calm, step-by-step process. Define the outcomes you want, shortlist by fit, test their thinking on site and choose the person who balances creativity with practical detail. When those pieces line up, the result is a garden that looks beautiful on day one and still works beautifully five winters from now.

Ready to discuss your project? Book a call with us!

Maintenance Tips for Block Paving

Maintenance Tips for Block Paving

Block paving looks brilliant when it is fresh, yet British weather, vehicles and everyday life will test it. A simple plan keeps joints tight, colours clean and surfaces safe underfoot. Use the paragraphs below as your year-round guide for patios, paths and driveways in Essex and across the UK.

Know your paving type

Standard block paving uses kiln-dried sand brushed into the joints. Keeping this sand topped up and compacted is essential. Permeable block paving uses a larger, open-graded joint stone and a free-draining sub-base. Avoid fine sand or non-breathable sealers that could block the system.

The golden rules

  1. Keep joints full and firm.
  2. Keep water flowing to drains and soakaways.
  3. Clean little and often with gentle methods.
  4. Treat stains early with the right cleaner.
  5. Only seal when the surface is dry, sound and ready.

Weekly and monthly quick wins

Most problems disappear if you give the surface a few minutes on a regular basis.

  • Sweep debris: remove leaves, soil and grit so they do not abrade the surface.
  • Clear gullies and channels: lift grates and remove silt so water cannot back up.
  • Top up joints: on a dry day brush in kiln-dried sand (or the correct permeable joint stone).
  • Spot clean spills: blot oil and grease, then apply a suitable cleaner.

Seasonal deep clean routine

Spring reset

Treat moss and algae with a patio biocide that suits your block type. Allow the stated dwell time, then rinse with a hose. When fully dry, sweep kiln-dried sand into joints and compact larger areas with a plate compactor fitted with a rubber mat. Check edge restraints and re-bed any loose kerbs on mortar.

Autumn prep

Control leaves to avoid tannin stains. If staining appears, use a mild patio cleaner. After heavy rain, note any pooling that signals settlement or blocked drainage and fix it before winter frosts make it worse.

Winter habits

Use calcium chloride or a de-icer marked safe for concrete. Avoid heavy rock salt. If snow arrives, use a plastic shovel to protect the surface and skip pressure washing during cold snaps.

Pressure washing without damage

Jet washing can lift colour but it is easy to overdo. Use a rotary patio head, keep pressure moderate and move steadily to avoid striping. Do not blast the joints. Always re-sand with kiln-dried sand after cleaning and compact larger areas, especially on driveways.

Weed control that works

Most weeds are wind-blown seeds in open joints. The cure is healthy joints and light prevention. Keep joints full, apply a biocide twice a year if needed and hand-weed early. If you use herbicide, choose a joint-safe product and re-sand once dry.

Stain removal guide

Engine oil and grease

Blot with absorbent granules. Apply a solvent-based degreaser for concrete pavers, agitate with a soft nylon brush, rinse and repeat if required. Let the area dry, then re-sand.

Rust marks

Use a rust remover formulated for concrete or stone and test a small patch first. Rinse thoroughly to neutralise.

Food and drink

For fresh wine, curry or barbecue spills, dilute with water, blot and clean with a pH-neutral product. For set stains, an oxygen-based cleaner can help without bleaching.

Algae and black spot

Apply a dedicated algae or black spot remover following the label. Rinse well, then consider a preventative biocide a few weeks later.

Paint splashes

Water-based paints: warm soapy water while fresh. Oil-based: a masonry-safe paint remover applied with care. Always test first.

Fixing sinking and uneven areas

Small dips often come from edge movement, poor drainage or bedding issues. Lift the affected blocks with a paver lifter, re-level the bedding layer, improve drainage if needed and relay. For persistent driveway dips in wheel tracks, strengthen the sub-base or add a geogrid, then compact and re-sand.

Efflorescence and colour variation

A pale powdery bloom can appear on new or newly cleaned paving. This is efflorescence and it fades with weathering. Brush and rinse rather than using harsh acids. Do not seal until it has passed and the surface is fully dry. Colour tone differences are normal; blending packs during installation reduces patchiness.

Sealing: when and why

Sealers can resist stains, enhance colour and bind joint sand, but only if used correctly. Wait until paving is clean, dry and fully settled. Choose a product designed for concrete block paving. For permeable systems use a breathable, permeable sealer or skip sealing altogether. Apply thin coats in a warm, dry spell and avoid pooling in joints.

Driveway-specific tips

Wheel paths lose jointing material faster, so check and top up more often. If you see scuffing where tyres turn, consider a harder-wearing block next time or adjust the turning route. If a vehicle drips oil, place a mat while you arrange a repair.

Permeable block paving care

Keep the system porous. Lift debris with a wet-vac or leaf blower rather than blasting joints. Avoid fine sand and non-permeable sealers. Clean soakaways, inspection chambers and linear drains so heavy rain can escape.

Simple toolkit

  • Soft broom, stiff nylon brush, bucket and hose or watering can
  • Patio biocide, pH-neutral cleaner, degreaser, rust remover
  • Kiln-dried jointing sand or the correct permeable joint stone
  • Protective gloves and knee pads
  • Rotary patio cleaner head and a plate compactor with rubber mat for larger areas

Five things not to do

  • Do not jet wash close to joints with a lance.
  • Do not fill standard joints with sharp sand.
  • Do not seal when the paving is damp or during a cold snap.
  • Do not overload decorative areas with rock salt.
  • Do not ignore early dips or loose edges.

Quick annual checklist

  • Spring: treat algae, gentle clean, re-sand, compact, check edges.
  • Summer: spot clean, clear drainage, top up joints after parties.
  • Autumn: leaf control, gully clear, mark any puddles for repair.
  • Winter: use concrete-safe de-icer, plastic shovel for snow.

Conclusion

Block paving will serve for decades if you keep joints healthy, water moving and cleaning gentle. Treat stains early, repair small dips before they spread and seal only when conditions are right. A few regular habits keep your driveway, patio and paths looking sharp and feeling safe.

Book a paving maintenance check

4 Types of Decking for Essex Gardens. Which Is Best?

Choosing decking for your garden should feel exciting, not confusing. Essex’s climate brings damp winters, clay soils that shift, and bright summer spells that can heat dark surfaces. Those conditions matter because they affect how different boards look, feel and last. Below is a clear, friendly walkthrough of the four most common decking options you will see in Essex: softwood, hardwood, composite and premium polymer.

1. Softwood decking

Softwood, usually pressure-treated pine or spruce, is the classic entry point. It gives an immediate feeling of warmth and fits almost any style, from cottage plots to family lawns. The big draw is cost and flexibility: it is affordable, easy to cut on site and straightforward to repair in small sections. The trade-off is care. In Essex’s damp winters, softwood needs an annual clean and treatment to keep algae at bay and the boards in good shape. Without good detailing, boards can cup, twist or silver unevenly, especially in shaded corners. If you choose softwood, make sure the sub-frame has ventilation, rain can run off rather than sit, and fixings are stainless or coated to prevent black staining. For tight budgets and DIY-friendly projects it is a perfectly valid choice, provided you are happy to give it regular attention.

2. Hardwood decking

Hardwood is where you go for a richer, longer-lasting timber feel. Species such as Iroko, oak and thermally modified timbers are denser and more stable than softwood, with a grain that reads as premium even from the patio doors. In an Essex garden that means fewer issues with movement and a surface that ages gracefully. You pay more at the start and you will still want to oil or seal it periodically if you wish to hold the colour, but many homeowners feel the look and underfoot feel are worth it. The heavier boards demand proper fixings and careful installation, so factor in skilled labour. If you love natural materials and can commit to occasional maintenance, hardwood delivers a timeless result.

3. Composite decking

Composite boards blend wood fibres with polymer to mimic timber while reducing upkeep. For busy families this balance is hard to beat. Quality composites resist rot and mould, hold their colour well and never need staining. Many systems use hidden fixings for a clean, modern finish, and slip resistance on better ranges is excellent even after a wet week. The caveats are mostly about choice and setting. Cheaper composites can fade or scratch more easily, and darker colours may feel warm under July sun, so pick tones that suit your exposure. Look for a board with a strong UK warranty, good wet slip ratings and ventilation space under the frame. If low maintenance is top of your list, composite will likely be your front-runner.

4. Premium polymer and capped boards

At the top of the performance tree sit high-end polymer or heavily capped composite boards. They are designed for long life, stain resistance and minimal upkeep, with textures that look convincing even close up. In exposed Essex plots or near the coast where salt spray and heavy weather can test materials, these boards earn their keep. Installation tolerances are tighter and upfront cost is highest, but the reward is a surface that shrugs off algae, wipes clean easily and stays smart for years. If you want your deck to look immaculate with the least possible maintenance, this is the category to shortlist.

Quick Comparison

Decking type Yearly care Durability / lifespan Slip resistance* Look & feel Best for Key watch-outs
Softwood (treated pine/spruce) High Medium Good when kept clean Classic timber, warm Tight budgets, DIY Needs annual clean/treatment; can warp in damp, shaded spots
Hardwood (Iroko, oak, thermo-timber) Medium High Good with regular care Premium natural grain Long-term, premium finish Needs oiling to keep colour; heavier install and fixings
Composite (WPC) Low High Very good on quality boards Timber-like, consistent Busy families, low maintenance Budget boards can fade/scratch; dark colours warm in sun
Premium polymer / capped boards Very low Very high Excellent on many systems High-end, modern Coastal/exposed sites, showpiece decks Precise install tolerances; verify ventilation and gaps

*Slip resistance assumes clean, well-installed boards; performance varies by brand and finish.

Which is best for Essex?

There is no single winner, only the best match for how you live.

  • If you want the lowest yearly effort, composite or premium polymer will give you the most relaxed ownership experience.
  • If you love the character of real wood and enjoy caring for it a couple of times a year, hardwood offers beauty and longevity.
  • If you are building on a tight budget and are happy to clean and treat annually, softwood delivers a traditional look for less.
  • For coastal locations, roof terraces and very exposed sites, premium polymer and top-tier composites provide extra resilience that often justifies the higher price.

A simple way to decide

  • If you want a smart deck with almost no fuss, choose a reputable composite or premium polymer in a tone that suits your sun exposure.
  • If you value the richness of real timber and do not mind occasional oiling, pick a durable hardwood or thermally modified option.
  • If the priority is getting a project built now for the least cost, go with softwood and promise yourself a yearly maintenance day.

Whatever you choose, the sub-structure and detailing decide how long your deck stays safe and handsome. In Essex that means a ventilated frame on solid supports, gentle falls so rain drains away, stainless fixings where salt may be present, and small expansion gaps to handle seasonal movement. A light spring clean and an autumn check make a huge difference. Good drainage beneath the deck, plus regular removal of leaves in shaded zones, will keep slip risks in check and extend the life of any board. Match the material to your lifestyle and your garden’s conditions, and your deck will look good, feel safe and earn its place as the heart of your outdoor space for years to come.

Ready to choose the right decking for your Essex garden? Book a free design consultation.

Colour Stories for Brick, Stone and Render Homes

An outdoor kitchen sits between house and garden. Get the colour story right and everything feels intentional, calm and expensive. Get it wrong and the terrace looks bolted on. Colour choices also affect maintenance and safety. Mid tones hide grime better than very light or very dark surfaces, and warm hues often feel comfortable in a cool Essex climate.

Below are tried and tested palettes for common Essex façades. Each palette lists paving, cabinetry or masonry, worktop, metals, timber and planting accents so you can build a coherent scheme from house wall to herb pot.

1. RED OR RUSSET BRICK

RED OR RUSSET BRICK

Mood: warm, timeless, family friendly.

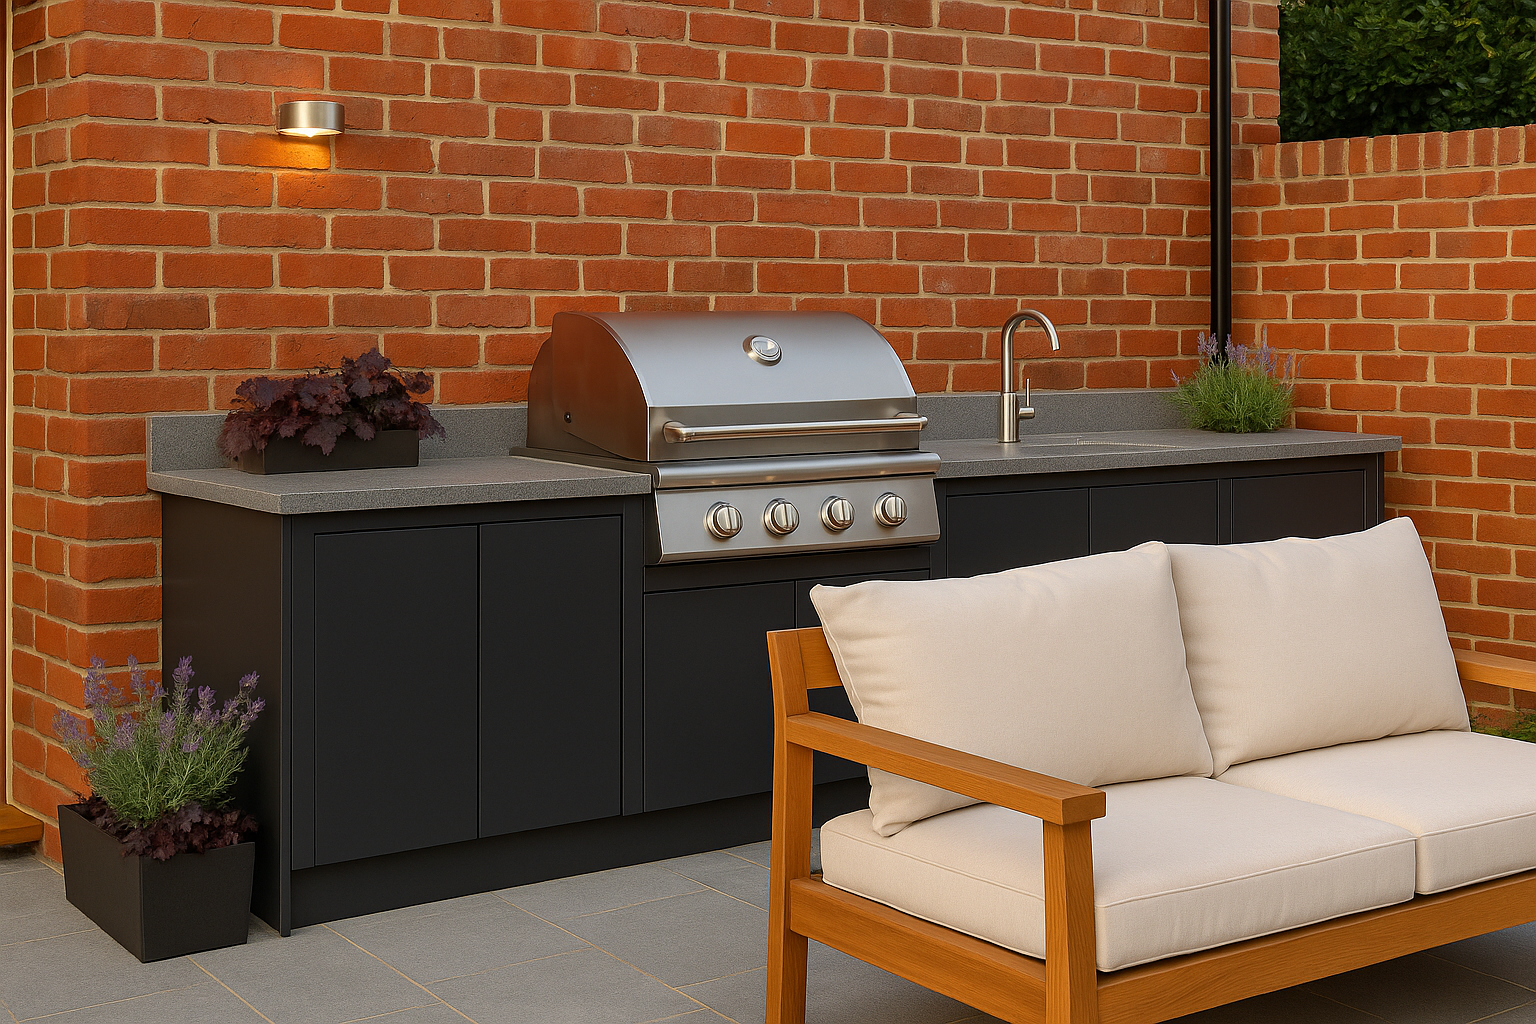
Paving: light to mid grey porcelain with a gentle texture. Greys calm the warmth of red brick without fighting it.
Cabinetry or masonry: charcoal or very deep graphite for a grounded base.
Worktop: mid grey sintered stone with fine salt-and-pepper grain.
Metals: brushed stainless or pewter. Highly polished chrome can feel cold against red brick.
Timber: honey or teak tones, oiled rather than stained dark.
Planting accents: deep greens with burgundy foliage, such as heuchera, and soft purple flowers like nepeta or lavender.
Lighting temperature: warm white around 2700–3000 K so brick glows rather than looks orange.

Why it works: cool greys balance warm brick, charcoal adds depth, timber and planting bridge house and garden.

2. BUFF OR YELLOW BRICK

Mood: sunny and light, can look washed out if paired with very pale finishes.

Paving: warm mid greys or pale taupe porcelain rather than white.
Cabinetry or masonry: olive grey or warm clay.
Worktop: biscuit to mushroom tone in a matte finish.
Metals: bronze, antique brass or smoked stainless.
Timber: oak or light ash tones.
Planting accents: silvery herbs, white flowers, soft blue catmint to cool the yellow.

Why it works: a touch of warmth in the hardscape prevents a clinical feel, bronze metals add richness without glare.

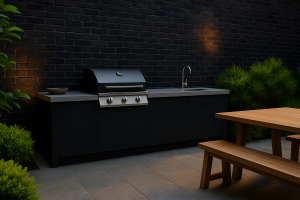
3. DARK BRICK

DARK or blackened BRICK home

Mood: dramatic, architectural.

Paving: mid silver grey or pale limestone-look porcelain for contrast and safe night-time visibility.
Cabinetry or masonry: soot, near black or dark olive for depth.
Worktop: pale concrete-look sintered stone to avoid a black hole effect.
Metals: black powder coat with brushed stainless highlights.
Timber: pale oak or thermally modified ash to lift the scheme.
Planting accents: lime greens and chartreuse to pop against dark walls.

Why it works: high contrast keeps the space legible, pale worktops and timber prevent the terrace from feeling heavy.

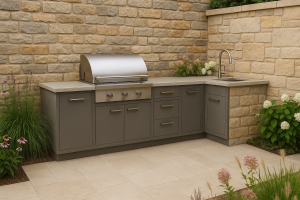
4. SANDSTONE OR MIXED NATURAL STONE

SANDSTONE OR MIXED NATURAL STONE

Mood: rustic to refined depending on the mix.

Paving: porcelain that echoes the stone’s lightest tone, never a close but imperfect match.
Cabinetry or masonry: warm grey or flint.
Worktop: mid greige with subtle movement.
Metals: galvanised or aged zinc feel honest beside stone.
Timber: weathered oak tones.
Planting accents: soft pinks, whites and grasses for movement.

Why it works: repeating undertones across materials creates harmony while porcelain provides durability and slip resistance.

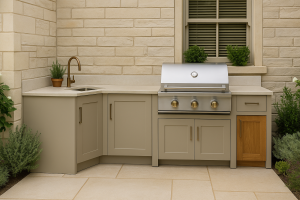
5. LIMESTONE OR PALE STONE

LIMESTONE OR PALE STONE

Mood: airy, classic, can feel cold in winter light.

Paving: light greige porcelain with a warm cast rather than blue grey.
Cabinetry or masonry: clay, putty or mushroom.
Worktop: creamy limestone-look sintered stone, matte finish.
Metals: brass or aged bronze to warm the scene.
Timber: mid oak.
Planting accents: deep greens, white roses, thyme, sage.

Why it works: gentle warmth keeps pale stone from feeling chilly, bronze details add character.

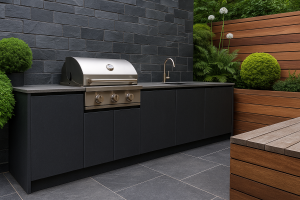
6. SLATE, FLINT OR CONTEMPORARY STONE

SLATE, FLINT OR CONTEMPORARY STONE

Mood: cool, sleek, graphic.

Paving: mid to dark grey porcelain with a fine texture.
Cabinetry or masonry: charcoal or blue grey.
Worktop: near black or very dark graphite, honed not polished.
Metals: black powder coat and stainless combined.
Timber: cedar left to silver.
Planting accents: architectural evergreens, ferns, white alliums for crisp points of light.

Why it works: a restrained monochrome palette looks deliberate, silvered timber softens the hard edges.

7. WHITE OR OFF-WHITE RENDER

WHITE OR OFF-WHITE RENDER

Mood: bright, crisp, reveals any mismatch fast.

Paving: soft mid grey to anchor the space.
Cabinetry or masonry: pebble grey or stone.
Worktop: pale concrete-look that is easy to wipe.
Metals: stainless or pale nickel.
Timber: warm teak or iroko for contrast.
Planting accents: olive greens, herbs, citrus pots where microclimate allows.

Why it works: mid tones prevent glare and hide day-to-day marks better than white slabs.

8. CREAM OR PARCHMENT

CREAM OR PARCHMENT

Mood: warm Mediterranean notes.

Paving: warm taupe porcelain or travertine-look porcelain with slip rating for outdoors.
Cabinetry or masonry: olive, sage or clay.
Worktop: light almond or pale travertine-look sintered stone.
Metals: brass or bronze.
Timber: rich teak.
Planting accents: rosemary, lavender, white jasmine, terracotta pots.

Why it works: earthy greens and bronzes echo sun-baked landscapes while staying practical in UK light.

9. MID TO DARK GREY

MID TO DARK GREY

Mood: modern, can look flat if everything else is grey.

Paving: pale silver or light greige to lift the elevation.
Cabinetry or masonry: deep charcoal for definition.
Worktop: pale concrete-look to create contrast.
Metals: black powder coat.
Timber: pale to mid oak for warmth.
Planting accents: lime hostas, silver plectranthus, white hydrangeas.

Why it works: contrast and timber prevent the all-grey trap.

10. BLACK TIMBER CLADDING

BLACK TIMBER CLADDING

Mood: Nordic, bold, photogenic.

Paving: pale grey or buff porcelain for legibility.
Cabinetry or masonry: black to match cladding or deep green for a softer take.
Worktop: pale stone look to reflect light.
Metals: black with touches of stainless.
Timber: pale ash or birch tones.
Planting accents: feathery grasses, white flowers, edible greens.

Why it works: light hardscape and worktops keep the area bright, planting softens the stark backdrop.

A strong colour story starts with the house, not the grill. Pick tones that complement your brick, stone or render, keep surfaces in practical mid ranges, and use metals and timber as small notes that tie the whole picture together. When the palette is coherent, the outdoor kitchen looks like it has always belonged, and you will enjoy it in every season.

What Is the Best Location for an Outdoor Kitchen in a Garden?

When designing an outdoor kitchen, one of the most important decisions you will make is its placement within your garden. While style and materials matter, the location you choose can greatly affect how functional, comfortable, and enjoyable the space will be throughout the year.

In the UK, where weather conditions can be unpredictable and gardens come in many shapes and sizes, finding the ideal spot for your outdoor kitchen requires careful planning. This article explores the best factors to consider when choosing the right location, helping you avoid common mistakes and get the most out of your investment.

Why Location Matters in Outdoor Kitchen Design

The placement of your outdoor kitchen determines how well it integrates with the rest of your home and garden. A poor location may lead to inconvenience, exposure to the elements, or lack of accessibility to essential utilities. On the other hand, a well-planned spot will offer easy movement, protection from weather, and a natural flow between indoor and outdoor living spaces.

The goal is to choose a location that balances beauty and practicality while enhancing your overall outdoor experience.

Proximity to the House

One of the first things to consider is how close your outdoor kitchen should be to your home. In most cases, placing it within a few metres of the back door is ideal. This makes it easy to move food, drinks, and utensils between the indoor kitchen and the outdoor one without walking across the entire garden.

A location close to the house also allows for easier access to gas, water, and electricity. This reduces installation costs and simplifies maintenance. Additionally, staying near the home provides more shelter from wind or rain, which is especially important during unpredictable UK weather.

Access to Sunlight and Shade

Pay attention to how the sun moves across your garden throughout the day. In a sunny spot, you can enjoy natural warmth and lighting, which enhances the comfort and ambience of your outdoor kitchen. However, constant direct sunlight can make the cooking area too hot or uncomfortable, especially during summer.

Look for a balanced location that receives gentle sunlight in the morning or early afternoon, and some shade during peak hours. If your chosen area lacks shade, consider adding a pergola, awning, or umbrella to keep things cool.

In gardens with a north-facing orientation, locate the kitchen where it gets the most exposure during midday. For south-facing gardens, some form of shading may be necessary to prevent overheating.

Shelter from Wind and Rain

UK gardens are often exposed to gusty winds and heavy rain, which can interfere with cooking and make outdoor gatherings less enjoyable. Position your outdoor kitchen in a spot that benefits from natural shelter such as a garden wall, hedge, or fence.

Wind protection is especially important when using gas grills or pizza ovens, as strong gusts can affect flame control and heat distribution. Shelter also reduces the amount of rainwater reaching the cooking area, helping protect surfaces and appliances over time.

If your garden is particularly open or on higher ground, you may want to install a purpose-built roof structure or enclosed pergola to provide year-round protection.

Drainage and Ground Conditions

Outdoor kitchens should always be built on stable, level ground with proper drainage. Avoid low-lying areas of your garden where water collects after rain, as this can lead to moisture damage, surface staining, or even structural issues over time.

The ideal location is one with firm ground and a gentle slope that allows water to run off naturally. Installing your kitchen on a solid paving base such as porcelain tiles or stone slabs will ensure durability and cleanliness. Good drainage is essential for both hygiene and longevity.

Connection to Dining and Social Areas

A successful outdoor kitchen is about more than cooking. It should also support dining, entertaining, and relaxing with family and friends. The kitchen area should be placed adjacent to or near your outdoor dining table or seating area, allowing easy flow between food preparation and mealtime.

Try to create an open layout where the cook is not isolated from guests. Positioning your kitchen with a clear line of sight to the dining space encourages social interaction and makes serving food more convenient.

Using the same paving material between the kitchen and the seating zone also creates a unified and visually cohesive look.

Utility Access: Gas, Water, and Electric

If your outdoor kitchen will include appliances such as a sink, fridge, or lighting, it is important to choose a location that allows easy access to utilities. Running water pipes, gas lines, or electrical wiring across a long distance can add considerable cost to the project.

Choose a spot that is close to existing utility access points from your home. Not only does this simplify installation, but it also reduces disruption to your garden. If you’re building a more advanced kitchen with lighting, sockets, or heaters, placing it near the house also ensures safer and more efficient connections.

Privacy and Views

Take a moment to think about how visible your outdoor kitchen will be from the house, from the street, or from neighbouring properties. You may want to create a space that feels private and secluded, especially if you plan to entertain guests often.

Look for spots in your garden that feel more enclosed or shielded, or consider adding fencing, trellises, or plants to create a sense of privacy. At the same time, think about what views you and your guests will enjoy while using the space. Orient the kitchen toward attractive areas such as a flower bed, pond, or lawn rather than facing a wall or shed.

This adds to the atmosphere and makes the kitchen feel like a central feature of the garden.

Design Cohesion and Flow

A well-located outdoor kitchen should feel like a natural part of your garden layout. Consider how the space connects with paths, patios, lawn areas, and other zones. Good design creates a smooth transition from the house to the garden, allowing guests to flow from one area to the next with ease.

Avoid placing the kitchen in an isolated corner unless the rest of your garden is designed to draw attention to it. Positioning the kitchen along the edge of a patio or under an existing pergola often works best for both form and function.

Choose a Location That Matches How You Live

The best location for an outdoor kitchen is one that reflects your lifestyle, garden layout, and year-round needs. Whether you want a quick-access kitchen next to the back door or a social hub in the centre of the garden, take time to evaluate factors like sun, shelter, utility access, and flow.

A thoughtfully chosen location will improve the comfort, usability, and value of your outdoor kitchen for years to come — rain or shine.

Need help choosing the perfect spot for your outdoor kitchen?

Essex Elite Paving specialises in designing and installing weatherproof, fully functional garden kitchens that are placed for maximum beauty and convenience. Our experts help you select the best location based on your layout and lifestyle.

👉 Schedule your free design consultation today!

What Materials Are Best for Outdoor Kitchens in the UK Climate?

Building an outdoor kitchen is an exciting way to extend your living space and enjoy cooking in the fresh air, but the UK’s ever-changing weather presents unique challenges. Choosing the right materials is critical for ensuring your outdoor kitchen stands up to the damp, frost, rain, and occasional sun that British gardens experience throughout the year.

In this guide, we explore the best materials for countertops, cabinetry, paving, and structures that are ideal for outdoor kitchens in the UK — helping you make informed choices that balance style, function, and long-term durability.

Why Material Selection Matters in the UK

The UK climate is known for being unpredictable. Heavy rain, high humidity, freezing winters, and low UV levels can damage materials not built for exterior use. Some materials swell or warp from moisture, while others crack from frost or deteriorate due to constant exposure.

Using weather-resistant, low-maintenance materials not only ensures your outdoor kitchen lasts longer, but it also keeps it looking its best throughout all four seasons.

Best Countertop Materials

Countertops are the workhorse of your outdoor kitchen, exposed to food prep, spills, heat, and the elements. Your choice should combine performance with resilience.

1. Granite

Granite is one of the best choices for outdoor countertops. It’s incredibly strong, heat-resistant, and available in a wide variety of colours and patterns. It withstands rain and frost well and doesn’t fade in the sun. While some types may require sealing, granite overall is a premium and long-lasting solution.

2. Porcelain Slabs

Porcelain is non-porous, stain-resistant, and UV-stable, making it ideal for outdoor surfaces. It won’t crack, fade, or absorb moisture, and it’s available in finishes that mimic marble, stone, or even wood — giving you both form and function.

3. Concrete

Concrete countertops are modern and customizable. When properly sealed, they offer excellent durability and weather resistance. However, they can be prone to cracking over time if not installed or maintained correctly.

Best Cabinetry Materials

Outdoor cabinets house your cooking essentials, so they need to be waterproof and resistant to warping or rust.

1. Stainless Steel (Grade 304 or 316)

Stainless steel is a top-tier choice for UK outdoor kitchens. It won’t rust, is easy to clean, and provides a professional look. Grade 316 stainless steel is especially good for coastal areas due to its higher corrosion resistance.

2. Marine-Grade Polymer (HDPE)

This synthetic material is impervious to water, doesn’t rot or swell, and resists mould and mildew. It’s often used in boat building, which tells you all you need to know about its performance in wet conditions.

3. High-Pressure Laminate (HPL)

HPL cabinetry is designed for outdoor use. It’s UV-resistant and moisture-proof, and comes in stylish finishes that look like wood, metal, or stone — without the upkeep.

Best Paving Materials

The flooring beneath your outdoor kitchen should be safe, stylish, and capable of handling spills, traffic, and temperature shifts.

1. Porcelain Paving

Porcelain paving is non-slip, frost-resistant, and extremely low maintenance. It doesn’t absorb water, making it ideal for damp UK conditions. Plus, it’s available in modern and classic styles to match any garden design.

2. Natural Stone (Slate or Granite)

Natural stone like slate or granite gives your kitchen a premium look and performs well when sealed properly. It’s slip-resistant and visually timeless, making it perfect for traditional outdoor spaces.

3. Resin-Bound Surfaces

Resin-bound surfacing is smooth, permeable, and slip-resistant. It’s great for surrounding areas and pathways but less commonly used directly beneath kitchen units due to structural load considerations.

Best Cladding and Wall Materials

Whether you’re enclosing part of your outdoor kitchen or building a sheltered space, your structural materials must endure year-round exposure.

1. Brick or Stone

Brick and natural stone are classic choices. They hold heat, resist weather, and require minimal upkeep. Both materials suit the aesthetic of British homes and gardens and blend beautifully with other landscaping elements.

2. Composite Cladding

Composite cladding mimics the look of real wood while resisting rot, UV damage, and water ingress. It’s a stylish and low-maintenance option for modern builds.

3. Rendered Walls (With Protective Coating)

Rendered masonry with a breathable, waterproof finish is a cost-effective solution for enclosing your kitchen area while still keeping things weatherproof.


Best Shelter Materials

A covered cooking area allows you to use your outdoor kitchen in all seasons.

1. Treated Timber Pergolas (with Waterproof Roof Panels)

Wooden pergolas create a warm, rustic look. When combined with polycarbonate or tiled roofing, they provide great protection and can support lighting, heating, or even retractable canopies.

2. Aluminium Structures

Aluminium is rust-proof, lightweight, and ideal for minimalist, contemporary garden kitchens. It requires no maintenance and pairs beautifully with composite and porcelain finishes.


Best Fixtures and Fittings

The smaller elements — hinges, taps, handles — can make or break your outdoor kitchen’s longevity.

1. Stainless Steel Fixtures

All handles, hinges, drawer runners, and screws should be stainless steel or aluminium to avoid rusting. If you’re using drawers or doors, choose marine-grade hardware where possible.

2. Outdoor-Grade Sinks and Taps

Use stainless steel or granite composite sinks and weather-rated taps for the best longevity and hygiene.

Build with the British Climate in Mind

Choosing the right materials is key to making your outdoor kitchen a true extension of your home — not just a seasonal feature. From frost-proof porcelain paving to marine-grade cabinetry, the materials you select must work with the UK climate, not against it.

If you invest in quality materials upfront, you’ll enjoy a stylish, functional, and low-maintenance space for years to come. Whether your style is rustic, contemporary, or timeless, there are climate-proof solutions available to bring your vision to life.

Thinking of building a weatherproof outdoor kitchen?


We help homeowners create long-lasting garden kitchens using only the best materials for UK weather. Our expert team offers custom design and professional installation — turning your outdoor space into a beautiful, functional oasis.

👉 Request your free quote now